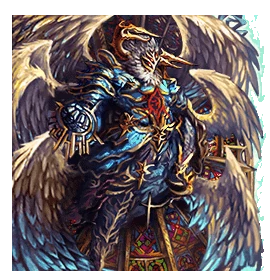
Been a long while. Just a quick Squad Spotlight to know I'm not exactly dead in creating these. They will be created at a very slow basis due to school, but better than nothing, right?
This Frontier Gate sums up all of the BS that you can ever think of, ranging from Noel's trial nuking your squad without you knowing it, Seria's Strategy Zone trial nuking your squad without you knowing it, Karna Masta single-nuking your squad without you knowing it... I feel like I'm repeating myself. Anyway, this Squad Spotlight entails a huge guide on how to take this monstrosity of a challenge, including some of the recently released units. This FG is definitely no joke, as it's probably the hardest content we've gotten on release.
Without further ado, let's start the Squad Spotlight!
Guide[]
There are a total of 10 battles, each containing a final boss from the Ishgria map. Unlike their normal questing variants, each of them have different perks to them that makes them rather challenging.
Battle 1: War Demon Shusui[]
- Turn 1, guard one unit and attack with the rest.
- Shusui will stay idle. Fail to do the above, you will get nuked.
- Upon attacking with your five units, pray that your mitigator fills its BB gauge.
- Turn 2, Shusui will use Empty Seal
- If you're worried about outputting damage on the next turn, you can attack with your units along with your mitigator. Be warned as you will risk possible deaths on the next turn.
- To play safe, mitigate and guard all.
- There's not much to Shusui as he will attack normally after the first two turns. There are random turns where Shusui will stay idle for one turn.
- When Shusui uses "Fierce God's Stance" or "Militant God's Stance", Shusui will stay idle.
- Guard all.
- When Shusui uses "Militant God's Stance", Shusui will start using "True War God's Blade Swing", which may buff-wipe units.
- Do whatever it takes to kill Shusui. You will risk units dying if you keep him alive any longer.
Battle 2: Guile Demon Mora[]
- Turn 1, Mora will use Empty Seal.
- This Empty Seal isn't too threatening at all. Make sure mitigation is up as always.
- At random turn intervals, Mora will put up a barrier, granting her 100% mitigation.
- There are six variants of this barrier.
- Depending on the number listed on the barrier, you will need to attack with that number of units. It doesn't matter how they attack, but they will need to deal some form of damage. Rest will have to guard.
- Examples:
- One-tier Barrier - Attack with 1 units, guard 5 units
- Two-tier Barrier - Attack with 2 units, guard 4 units
- Three-tier Barrier - Attack with 3 units, guard 3 units
- Four-tier Barrier - Attack with 4 units, guard 2 units
- Five-tier Barrier - Attack with 5 units, guard 1 units
- Six-tier Barrier - Attack with 6 units, guard 0 units
- No thresholds beyond Turn 2.
Battle 3: Tech Armor Beiorg[]
With more and more units having the ability to OD fill and there are more chances to UBB, Beiorg can easily be nuked. I will provide two methods on how to go about with Beiorg.
Method 1: Playing Safe
- Beiorg will provide himself Angel Idol. There are two variants: one that doesn't heal and the other that heals to full.
- At any point of this battle, do not deal more than 8% HP of damage on any turn.
- Breaking this will allow him to recover to full HP once you get him to 0%.
- Upon revival, Beiorg will buff himself with more damage utility.
- First revival, Beiorg will have a 100% Atk buff.
- Second revival, Beiorg will have a 150% Atk buff.
- Third revival, Beiorg will have a 30% crit rate buff.
- If you're fighting Beiorg revived, take note that you will be receiving significantly more damage. UBB mitigation might be necessary.
- If you're fighting Beiorg on the third revival, make sure you have a critical resistance buff active every turn.
Method 2: Nuking the living tech out of Beiorg
- Beiorg will provide himself Angel Idol. There are two variants: one that doesn't heal and the other that heals to full.
- This method involves ignoring the 8% damage rule completely.
- First turn, overdrive your 75% mitigator (ideally Ark or Regil) and fire off all SBBs.
- Second turn, UBB and keep spamming SBBs until Beiorg dies. Having BB-on-Spark helps significantly to keep your BB gauges up and full.
- This isn't always a reliable tactic as Beiorg may buff-wipe all units. Though, it will save a ton of time instead of spending a tremendous amount of time being precise about your damage.
Battle 4: Decay Demon Melord[]
Like Beiorg's guide, I'll provide two methods on how to go about with Melord.
Method 1: Playing Safe Yet Again
- Note for all of the "Stinky Infection" thresholds, only one "Stinky Infection" phase will occur at a time. Once you cross a threshold, you only have to pay attention to the threshold you just crossed.
- If you happen to forget which units got targeted by "Stinky Infection", don't stress. Guard everyone just to be absolutely safe.
- For example, if you crossed both the 80% and 50% threshold, you only have to worry about the 50% threshold.
- Turn 1, Melord will cast "Stinky Infection" on two of your units.
- Take note of these two units. These will have to guard on Turn 3.
- Turn 3, Melord will cast "Stinky Hazard" on the two units targeted with "Stinky Infection".
- Note that Melord will NOT undergo this threshold when his HP is below 80%.
- Upon reaching 80% HP, Melord will cast "Stinky Infection" on two of your units again.
- The two targeted units will have to guard two turns after.
- For example: Two units get targeted with "Stinky Infection" on Turn 3. Those two units must guard on Turn 5.
- Upon reaching 50% HP, Melord will cast "Stinky Infection" on two of your units again.
- Rather than waiting for two turns to guard, you have to guard those two units immediately once they get targeted.
- Upon reaching 10% HP, Melord will cast "Stinky Infection" on two of your units again.
- Just like the 50% HP threshold, guard the units immediately once they get targeted.
Method 2: Nuking the living goo out of Melord
- This involves hyper offense, paying very little attention to the thresholds. Since each threshold overwrites previous thresholds, there is very little need to worry about the guarding.
- Ignore all guarding when Melord is above 50%.
- On the turn Melord uses his "Stinky Infection" attacks when below 50% HP, try and nuke Melord below 10% or potentially to death.
- This method of nuking requires some specifics, including an OD filler to keep up your Overdrive gauge to savor for subsequent battles, a BB-on-Spark unit (such as Lauda, Felice, Silvie, etc.), and a Regil friend. If you're able to nuke effectively, you might not even have to worry about any of the thresholds at all.
Battle 5: Nature Demon Mordlim[]
- Turn 1, Mordlim will buff-wipe your units and use Empty Seal.
- Highly recommend guarding. Mordlim's Empty Seals aren't particularly strong, but might be worth reducing risks by guarding.
- When below 40% HP, Mordlim will buff-wipe your units and use Empty Seal again.
- Again, not really threatening. If you really want to play it safe, use one unit to cross the threshold and guard the other units. Note that Mordlim has the HoT regen buff recovering her HP by 200000-250000 HP, so the safe method might not be too ideal.
- When below 15% HP, Mordlim will buff-wipe your units and use Empty Seal again.
- Same as before.
Checkpoint[]
If you made it this far, congrats! Whenever your squad gets wiped from here forward, you can use one Frontier Orb to go back to this checkpoint.
If you're wondering which bonus to take when going up against Battles 6-10, Item Set is generally the most preferred set to take. This gives you one chance to revive a dead unit and use Fujin Potions during harsh situations, most importantly against Karna Masta.
Battle 6: Owen[]
- If you use items in any part of this battle, Owen will buff-wipe you. This isn't a threatening attack, but it will waste your buffs and potentially cause death with Owen's other attacks that follow.
- When below 65% HP, Owen will use a strong AoE.
- Not too big of a nuke. UBB mitigation is definitely not needed for this one. Given the recent power creep of newly released units, this nuke shouldn't be that much of an issue.
- Owen will then recover 2,000,000 HP after this.
- When below 50% HP, Owen will cast another strong AoE and buff himself with 100% Atk, Def and +1 hit count.
- Similar nuke to the last one, but Owen receives buffs.
- From this point, try and kill Owen ASAP. Owen starts dealing more damage with his buffs up.
- Don't be afraid to use UBB during this battle if this is giving you trouble.
Battle 7: Calamity Demon Amu Yunos[]
This battle can be pretty stupid with RNG. You've been warned.
- DO NOT GUARD AT ANY POINT ABOVE 30% HP OF THIS BATTLE.
- Amu Yunos will single target nuke every unit that guarded. This nuke is unsurvivable.
- Nothing special above 50% HP.
- When below 50% HP, Amu Yunos will drain all BB gauges and buff herself with 40% Atk, Def and 15% crit rate buffs.
- Try not to nuke her too much, especially past 30% HP. You want to take your time generating your mitigator's BB gauge before firing it off on the 30% HP threshold.
- When below 30% HP, Amu Yunos will remain idle.
- Next turn, Amu Yunos will use Empty Seal.
- This Empty Seal is pretty strong. You can guard all this turn if you applied 2-turn mitigation the previous turn. This is why timing your BBs is important for this battle. If you didn't, you will have to use UBB mitigation.
- When below 10% HP, Amu Yunos will use another Empty Seal.
- To avoid this, try and nuke Amu Yunos to 0% HP.
- If not, you can pass this threshold with one tanky unit and guarding the others. You will probably risk losing the tanky unit you used to attack. If you used 3-turn UBB mitigation prior to this threshold, this Empty Seal shouldn't be too hard to survive.
Battle 8: Dragon Demon Barion[]
- Keep track of the amount of BB used. 20 BB/SBB will proc Barion's Empty Seal.
- This is the strongest Empty Seal you'll ever experience in your life. Try and avoid this as much as possible.
- If you cross the 30% HP threshold when bypassing the number of BB/SBB, Empty Seal will be used the next turn
- If you want to remain damage efficient with your BBs, you can try and use this attack pattern:
- Turn 1: 5 BB/SBB + 1 normal attack
- Turn 2: 5 BB/SBB + 1 normal attack
- Turn 3: 5 BB/SBB + OD mitigator + 1 normal attack
- Turn 4: 6 BB/SBB/UBB to try and get Barion to below 30% HP
- Turn 5: Guard all
- When below 30% HP, Barion will remain idle and buff himself with 50% damage mitigation.
- Guard all if you crossed the 20 BB/SBB threshold.
Battle 9: Heresy Demon Kalon[]
- DO NOT GUARD AT ALL. PERIOD.
- Kalon WILL buff-wipe and nuke your entire squad.
- Kalon will inflict DoT on your units for 3 turns on the first turn.
- This isn't too problematic as Kalon will be applying more DoT debuffs in later thresholds anyway.
- When below 65% HP, Kalon will reapply DoT and cast damage reflect for 2 turns.
- Time your heals. If you have Ark, this shouldn't really be much of a problem. HC production is your friend for recovering back to full.
- Alternatively, you can BB/SBB your healer last after your units receive reflect damage.
- When below 40% HP, Kalon will reapply DoT and cast damage reflect for 2 turns again.
- Same threshold as 65% HP.
- When below 30%, Kalon will stay idle.
- If possible, you can completely ignore this threshold by nuking him from above 30% HP to 0%.
- Kalon will use Empty Seal the next turn. Guarding is recommended here.
- After Kalon uses Empty Seal, you have three turns to kill him, or he will use Empty Seal again.
- You can try and kill him from this point. If you can't, on the turn when Kalon uses "Third Act", guard all units.
Battle 10: Holy Emperor Karna Masta[]
YOU THOUGHT KARNA MASTA IN MILDRAN WAS BAD? PREPARE FOR SOME MORE RNG!
Love,
Alim
First Form
- Overall, not a threatening phase.
- When below 50%, Karna Masta will remain idle for this turn.
- There are two ways to go about with this: Use 6 BB/SBB or Guard All
- Using 6 BB/SBB will cancel the upcoming nuke.
- Guarding everyone will proc the nuke, but everyone will still live if guarding.
- At 0% HP, Karna Masta will transform to his second form.
Second Form
- Turn 1, DO NOT cross his 90% HP threshold. Karna Masta will use his buff-wipe ultimate attack if you do so.
- If you feel that you'll deal too much damage on this turn, guard all.
- When below 90% HP, Karna Masta will buff-wipe the squad.
- Karna Masta can still use his normal attacks and common skills after this.
- Try and use one unit to pass this threshold and guard everyone else.
- When below 50% HP, Karna Masta will buff-wipe the squad.
- Same threshold as 90% HP.
- When below 25% HP, Karna Masta will remain idle for this turn.
- Very similar to the idle-nuke-next-turn idea as Phase 1, but you have to guard all units to survive this nuke.
- At 0% HP, Karna Masta will transform to his final form.
Final Form
- Turn 1, all units will have their buffs removed and their Leader Skills locked for 2 turns. Also, Karna Masta will have full HC & BC drop resistance for 2 turns as well.
- Your units will become squishy at low HP. You can try and guard all to stall out the Leader Skill lock and move on from here.
- Until Karna Masta reaches below 50% HP, Karna Masta will be draining your units' BB gauges every turn. Hope you brought BB-on-hit and BB-on-Spark.
- When below 50% HP, Karna Masta will lock all Leader Skills for 2 turns once again. Units will also receive a heavy Ares Down debuff.
- If you used mitigation the turn before, do not use mitigation this turn. Use mitigation the next turn.
- When below 30% HP, Karna Masta will provide 100% mitigation for himself for 1 turn.
- Nothing really important. You can use this opportunity to generate BB gauges.
- At 0% HP, Karna Masta will nuke the entire squad with buff-wipes and fully drains all units' BB gauges.
- Before crossing this threshold, have at least two units on guard, ideally guarding your mitigator in the process.
- Karna Masta will revive with 150,000 HP.
- Finish him off. You likely want to use a Fujin Potion on your mitigator.
- Congratulations! You've cleared probably the hardest Frontier Gate in the entire game.
Team Building[]
I've covered a number of buffs throughout the buff, but they were relatively scattered throughout. To make the process easier, I've made a list of buffs that are recommended to take along in this monstrosity of a challenge.
Recommended Leads:
- Pure General Regil
- Knight of Holy Light Ark
- Rain (Omni)
- Ruinous Despoiler Galtier
- Blazing Phoenix Feng
- Strife God Afla Dilith
- Silent Sentinel Silvie
- Ideal Subject Lauda
- Eternal Goddess Felice
- Celestial Wings Lara
- Sacred Emperor Sirius
- Howling Wolf Zekt
Recommended Buffs:
- BB-on-Hit: Damage taken boosts BB gauge
- This will be very important against Karna Masta.
- Units include Gabriela, Agress, Felice, Zelnite, etc.
- BB-on-Spark: Spark damage boosts BB gauge
- Units include Adriesta, Felice, Lauda, Feeva, etc.
- 2-Turn 50% Mitgation
- Units include Eleanor, Elimo, Hisui, Ilm, etc.
- 3-Turn 75% Mitigation on UBB
- Units include Ark, Regil, Agress, etc.
- OD filler
- This can come in handy if you want to use UBB often. Not a must, however.
- Units include Arus, Zalts, Haido, Rengaku, etc.
- Angel Idol on UBB
- Not much of a required buff to take along, but can be useful if you want to play safe.
- Units include Holia, Gabriela, etc.
- Status cleanser
- Enemies can paralyze and curse.
- Units include Krantz, Hisui, Stein, Ark, etc.
Squad Spotlight[]
Squad 1: Linathan Clear[]
| Sub1: Ideal Subject Lauda | Sub2: Chivalrous Thief Zelnite | ||
| Lead1: Doombringer Azurai | Lead2: Knight of Holy Light Ark | ||
|---|---|---|---|
| Sub3: Glorious Hero Krantz | Sub4: Graceful Princess Elza |
Forgot the sphere compositions, as this was done a very long time ago.
Squad 2: Linathan Clear Post-Regil Release[]
| Sub1: Supreme Chol Arus | Sub2: Silent Sentinel Silvie | ||
| Lead1: Rain (Omni) | Lead2: Pure General Regil | ||
|---|---|---|---|
| Sub3: Infinity Starsage Zeruiah | Sub4: Silver Queen Gabriela |
- Rain (Lead): Heaven's Edge & Growth Device
- Arus: Scarlet Necklace & Courage Aegis
- Silvie: Sky Orb & Unyielding Device
- Zeruiah: Beiorg's Armor & Resistive Device
- Gabriela: Beiorg's Armor & Soul Armor
- Regil (Friend): Heaven's Edge & Unyielding Device
Squad 3: Ushi Clear[]
| Sub1: Heavenly Spiral Hisui | Sub2: Dancing Flames Rengaku | ||
| Lead1: Howling Wolf Zekt | Lead2: Knight of Holy Light Ark | ||
|---|---|---|---|
| Sub3: Graceful Princess Elza | Sub4: Ideal Subject Lauda |
- Zekt (Lead): Drevas & Resistive Device
- Hisui: Virtuous Cape & Schism Orb
- Elza: Beiorg's Armor & Impiety Orb
- Rengaku: Bourn Jewel & Growth Device
- Lauda: Sacrilege Orb & Phantom Device
- Ark (Friend): Oracle Bangles & Sacrilege Orb
Squad 4: DonQuiXoTe888 Clear[]
| Sub1: Void Pasha Ensa-Taya | Sub2: Heavenly Spiral Hisui | ||
| Lead1: Knight of Holy Light Ark | Lead2: Doombringer Azurai | ||
|---|---|---|---|
| Sub3: Void Walker Zenia | Sub4: Chivalrous Thief Zelnite |
Credits to one of my guildies for providing me the squad composition. Ensa-Taya can be replaced with any unit with BB-on-Spark, ideally Feeva.
Special Thanks[]
Huge thanks to DonQuiXoTe888 and Ushi for their squad composition.
Conclusion[]
Have a better idea of how to tackle this FG better? Can you survive against all of the Ishgria Demons in one sitting? Leave a comment below!
Check out my list of analyses in Spotlights: Table of Contents!


